How to Make a Minecraft Server
On this page
There are 3 ways to make a Minecraft server: host it yourself on your own computer (free but technical), rent a VPS and set it up manually (cheap but command-line only), or use a hosting service like LuckyChunk ($20/month, zero setup, ready in under a minute). Self-hosting takes 30-60 minutes and requires port forwarding; a hosted server takes about a minute and requires nothing. This guide walks through all three, step by step, so you can pick the one that fits how technical you want to get.
Having your own Minecraft server means your friend group gets a world that's always there. No strangers, your rules, your world. The question is just how you want to make it happen.
You can do it for free if you don't mind getting your hands dirty, or pay someone else to handle the technical stuff. Here's every way to make a Minecraft server, starting with the fully DIY approach.
Method 1: Host a Server on Your Own Computer
To make a Minecraft server on your own PC, you download the official server file from Mojang, run it, and your computer literally becomes the server. It's completely free, and it's the method every other method is secretly built on - a hosting company is just someone else's computer doing these exact steps.
What you need
- A computer with at least 4 GB of RAM to spare (8 GB+ total recommended)
- Java installed - which version depends on your Minecraft version:
| Minecraft version | Java version required |
|---|---|
| 1.20.5 and newer (including current versions like 26.2) | Java 21 |
| 1.17 to 1.20.4 | Java 17 |
| 1.16.5 and older (1.12.2, 1.8.9, ...) | Java 8 |
- A stable internet connection
- Access to your router's settings (for port forwarding - explained below)
Step-by-step setup
- Download the server file. Go to minecraft.net and download the server .jar - that one file is the entire server program. It must match the version your group plays: a 1.12.2 group needs the 1.12.2 server file. If anyone's game is on the wrong version, our how to change your Minecraft version guide shows them how to switch in the launcher.
- Create a folder. Anywhere is fine - name it something like "Minecraft Server" and put the .jar inside. The server generates a dozen files and folders around itself when it runs, so don't launch it straight out of Downloads unless you enjoy chaos.
- Run the server for the first time. Open a terminal or command prompt, navigate to your folder, and run: java -Xmx2G -Xms2G -jar server.jar nogui. In plain language: -Xmx2G caps the server at 2 GB of memory, -Xms2G hands it those 2 GB up front so it doesn't stutter while grabbing more, and nogui skips a graphical window you don't need. It will fail the first time - that's normal. The server checked whether you've accepted Minecraft's license agreement, saw that you haven't, and quit.
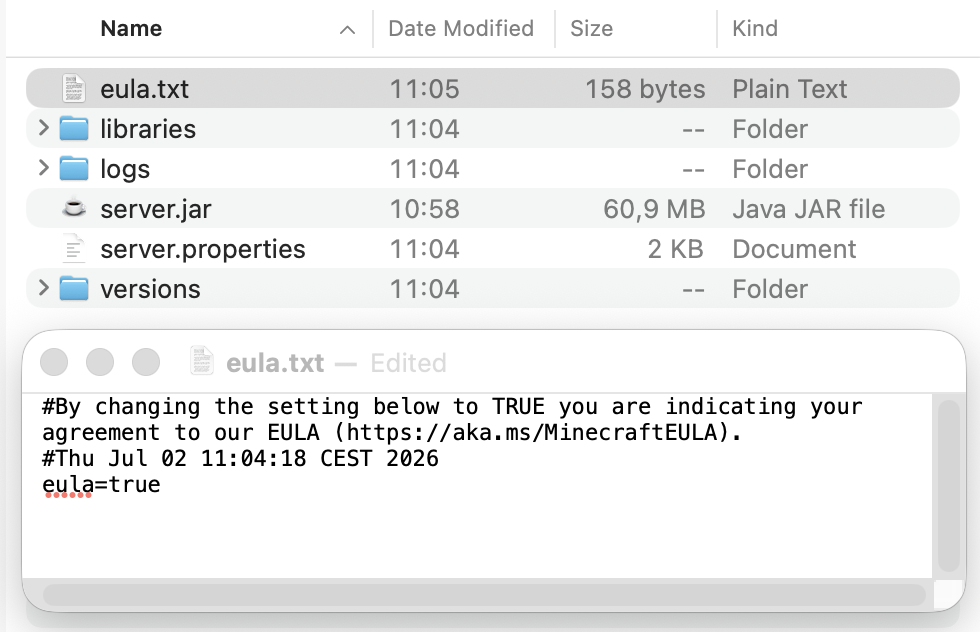
- Accept the EULA. A file called eula.txt has appeared next to the .jar. Open it in
any text editor - it's three lines: two comment lines and eula=false. Change false to
true, save, close. That's you agreeing to Minecraft's usage rules.
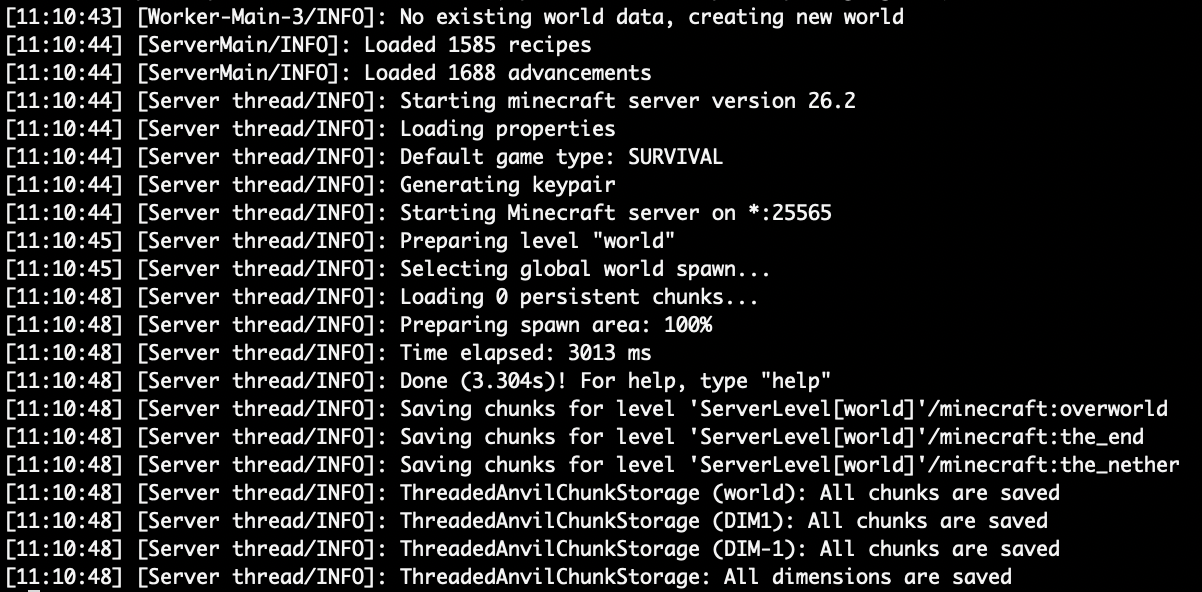
- Run the server again. Same command as step 3. This time it generates your world - give it a
minute or two - and finishes with a line like Done (3.304s)! For help, type "help". Your server is
now live. You can even join it from the same PC right away: Multiplayer, Add Server, address
localhost.
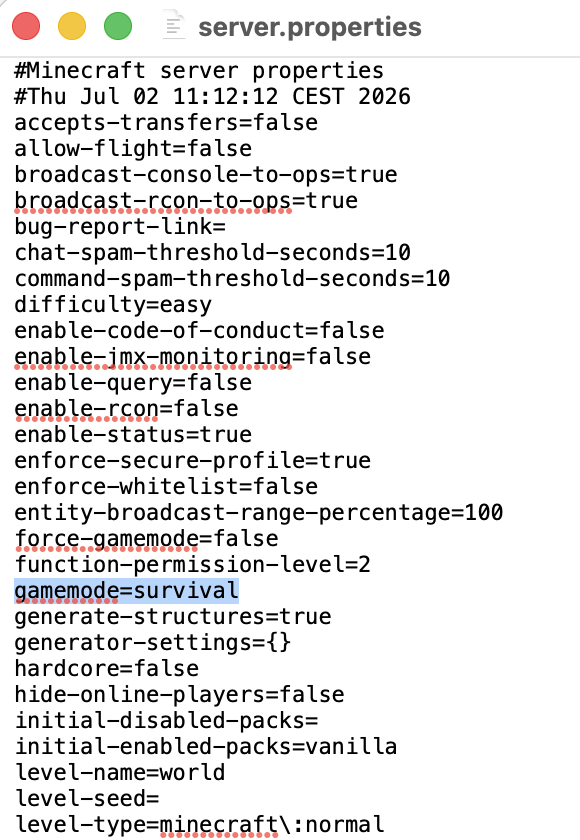
- Configure server.properties. After that first successful run, a file called
server.properties sits in the same folder. It's plain text, one setting per line, and this is where
the server is actually configured: gamemode, difficulty, max-players,
white-list, and motd (the message shown under your server's name in the multiplayer list).
Edit, save, restart the server to apply.
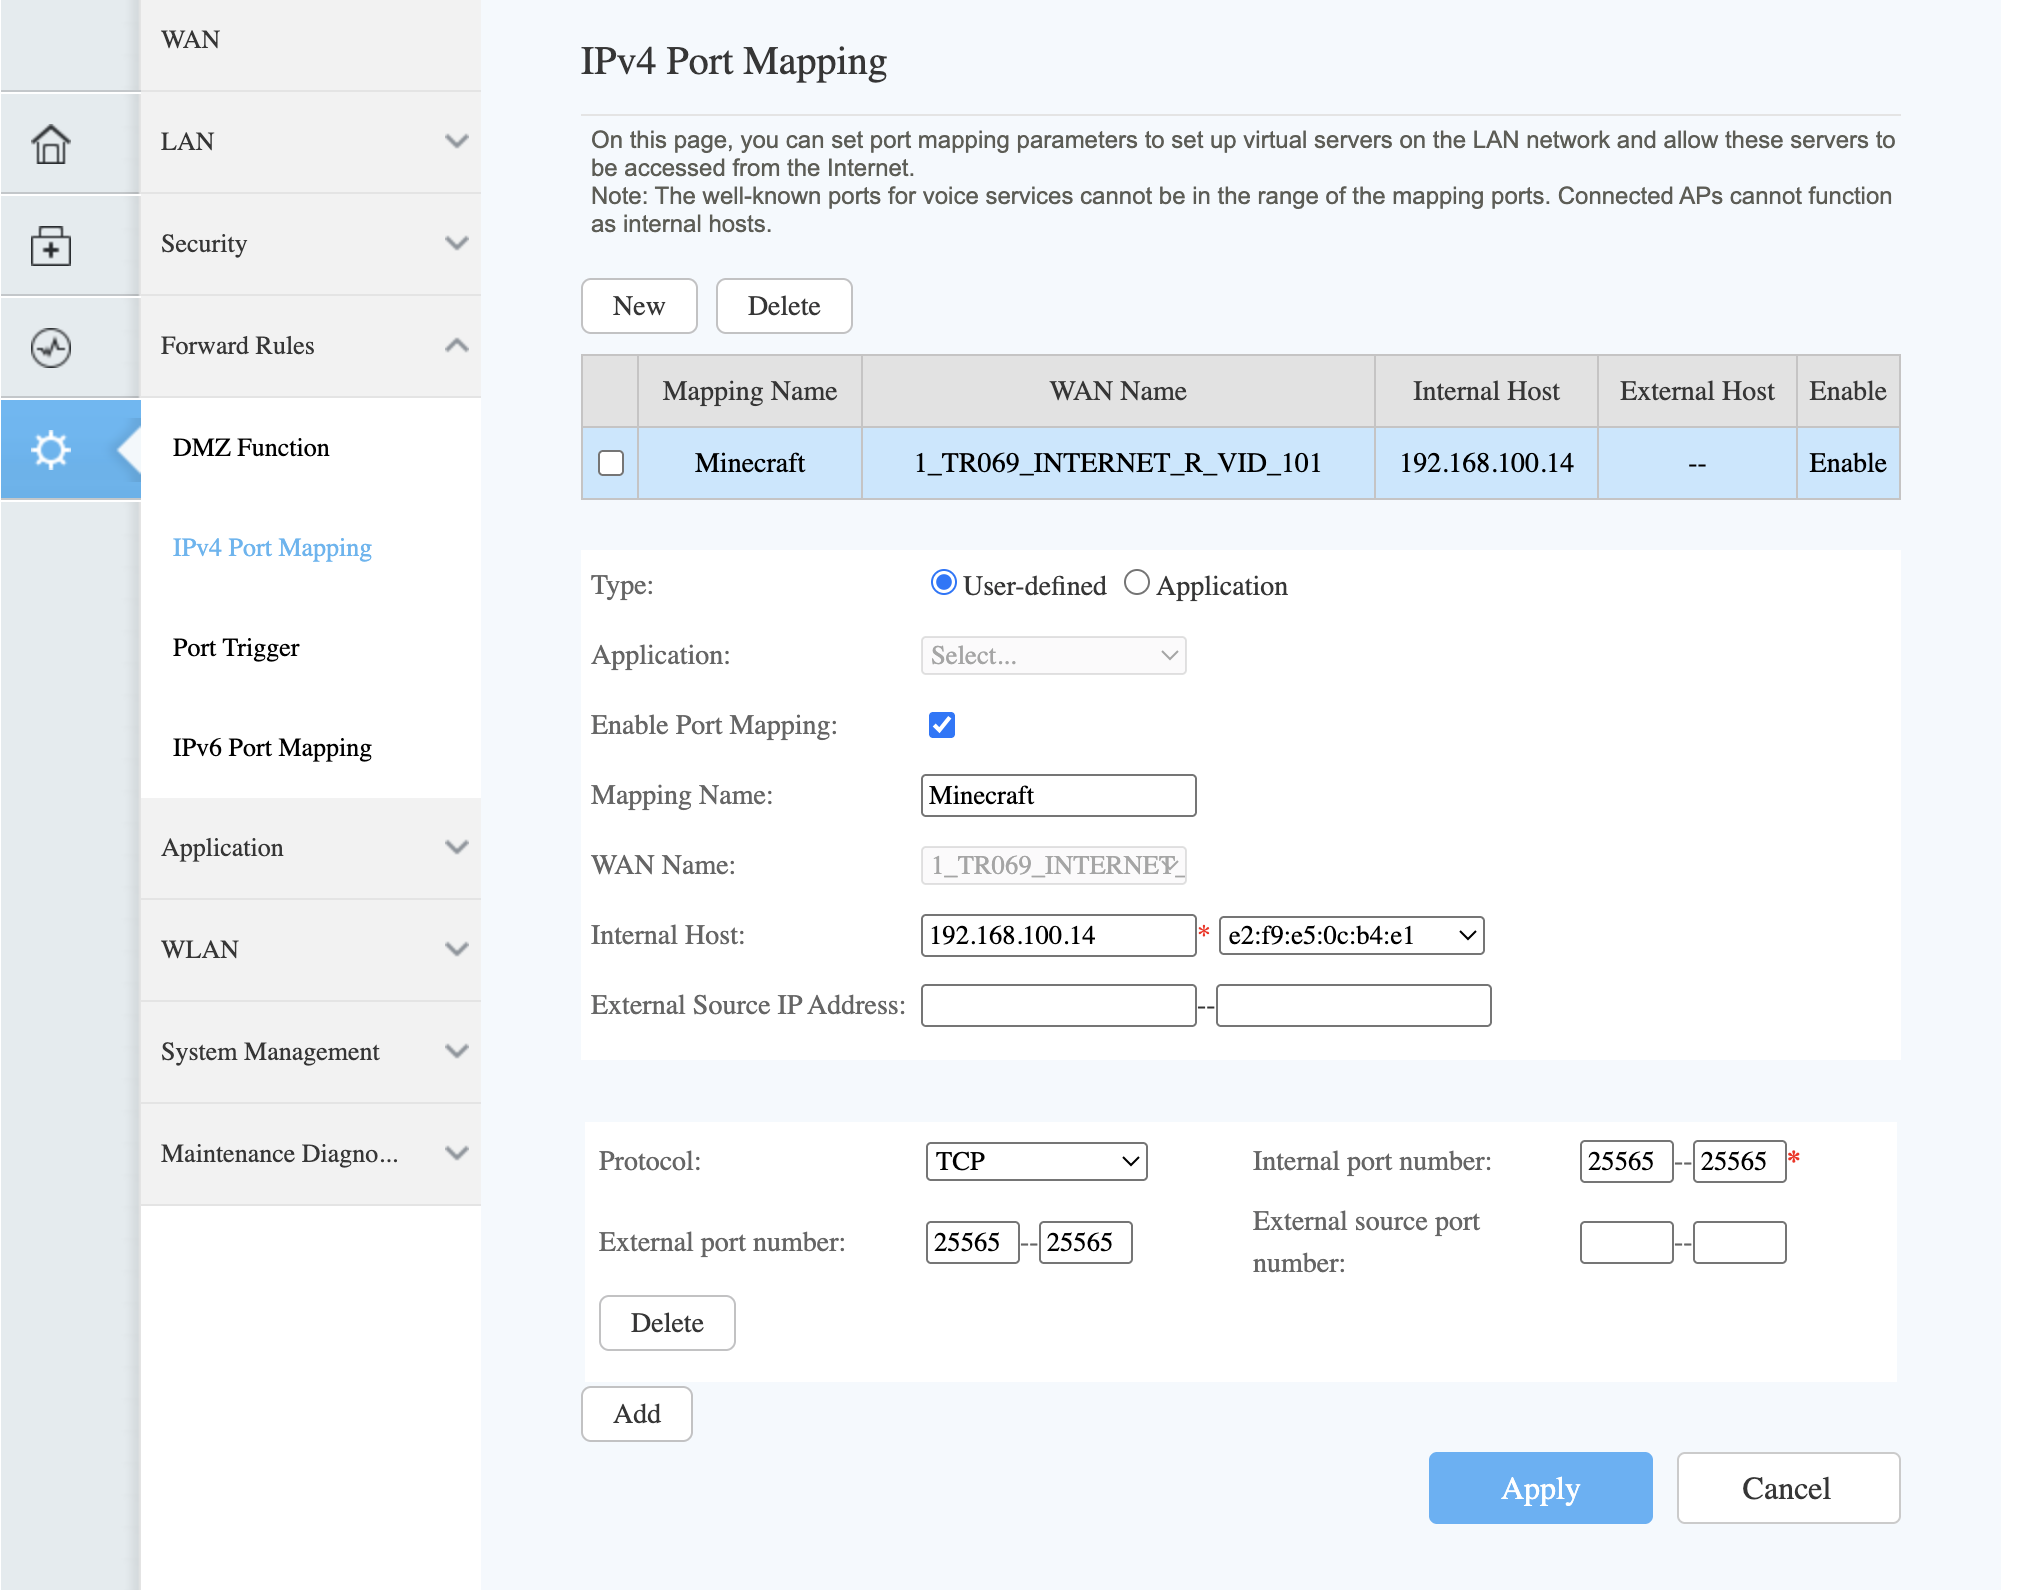
- Set up port forwarding. This is the step that decides whether the project succeeds, so
budget most of your time here. Right now only you can join; port forwarding is how you tell your router to
let friends in from the internet. Log into the router's admin page (usually by typing 192.168.1.1
into your browser), find the port forwarding section, and forward port 25565 (TCP) to your
computer's local IP address. Every router buries this setting somewhere different, so search for
instructions for your exact model. And a warning: some internet providers put homes behind shared addressing
(often called CGNAT) that makes port forwarding impossible no matter what you do - if nothing works, that's
probably why.
- Find your public IP address. Search "what is my IP" in your browser. That number is your server's address on the internet.
- Share the address. Your friends go to Multiplayer, click Add Server, paste your public IP, and connect. Send them our how to join a Minecraft server guide if they get stuck.
Pros
- Completely free
- Full control over every setting
- Can install mods and plugins
Cons
- Requires technical comfort - port forwarding, Java, and a terminal
- Exposes your home IP address to anyone who connects, which is a real privacy and security concern
- The server only exists while your computer is on and running it - friends can't play while you're asleep
- Hosting and playing on the same machine hits performance hard
- You're the one doing backups, updates, and 2 AM fixes when something breaks
Best for: people who know their way around a terminal and want complete control over their server.
Method 2: Rent a VPS and Set It Up Yourself
A VPS (virtual private server) is a computer in a data center that you rent by the month. You set up the Minecraft server on it exactly like Method 1, except it runs 24/7 and your home IP stays private. The trade: everything happens over a text-only connection, so you need to be comfortable with the command line.
Step-by-step setup
- Rent a VPS. Providers like Hetzner, DigitalOcean, or OVH start around $5-10/month for a machine with 4 GB of RAM. Pick Linux as the operating system - Ubuntu is the safe default. (For the full budget picture across every option, see our how much does a Minecraft server cost breakdown.)
- Connect to it. You control a VPS through SSH, a tool that gives you a terminal on the remote machine. On Mac or Linux: ssh root@your-server-ip. On Windows, PuTTY does the same job.
- Install Java. On Ubuntu: sudo apt update && sudo apt install openjdk-21-jre-headless. Java 21 covers Minecraft 1.20.5 and newer; use Java 17 for 1.17-1.20.4 or Java 8 for older versions (same table as Method 1).
- Download and run the Minecraft server. From here it's Method 1 again - download the .jar, accept the EULA, edit server.properties, start it up. No port forwarding needed: a VPS is already reachable from the internet.
- Keep it running. If you just start the server and close SSH, the server dies with the connection. A tool like screen or tmux keeps it alive after you disconnect.
- Share the VPS IP address. Friends connect to it exactly like any other server address.
Pros
- Runs 24/7 without touching your own computer
- Your home IP stays private
- Full control - install whatever you want
- Data center internet is far better than a home connection
Cons
- Not free - you're paying monthly either way
- Command line only: SSH, Linux basics, no graphical anything
- Setup, updates, backups, and troubleshooting are all yours
- If it breaks at 2 AM while your friends are playing, that's on you
Best for: people who know Linux basics and want an always-on server without sharing their home IP.
Method 3: Use a Minecraft Hosting Service
A hosting service runs the server hardware for you - you sign up, and the technical parts of Methods 1 and 2 are someone else's job. If you read the port forwarding step and felt tired, this is the option for you.
Most hosting services still hand you a control panel full of RAM sliders and CPU tiers, though. Fine if you're an experienced admin. Overkill if you just want a world for your friend group.
How it works with LuckyChunk
LuckyChunk skips the homework. The whole setup:
- Pick your Minecraft version - current like 26.2, or old ones like 1.12.2 and 1.8.8 that most hosts don't bother with
- Pay ($20/month)
- Your server is ready - share the address with friends
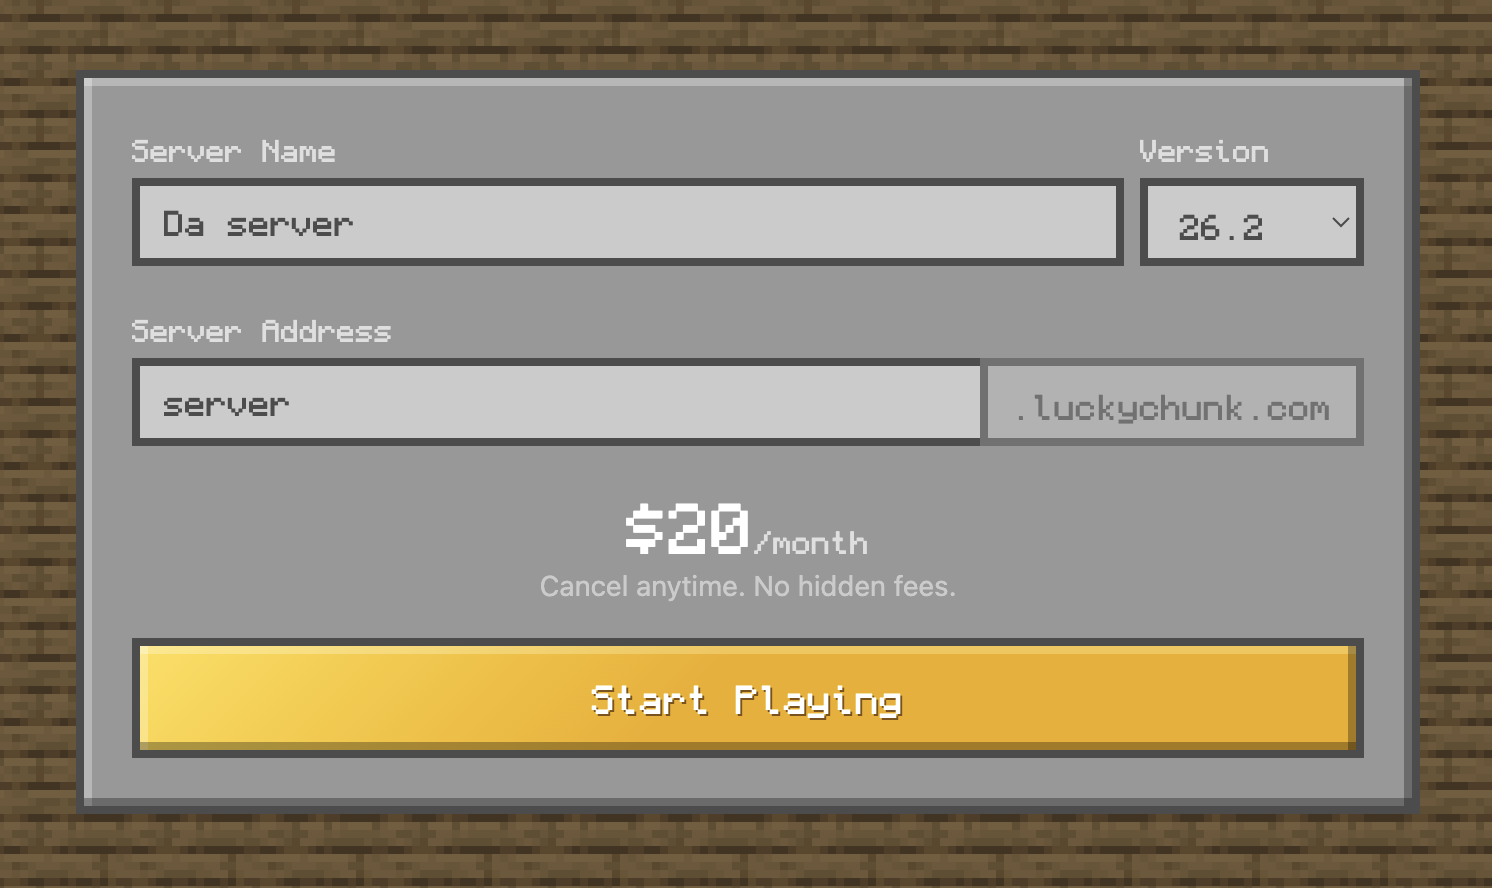
That's it. Up to 20 players, pure vanilla Minecraft, and a simple panel for the things you'll actually want: whitelisting friends, switching versions, resetting the world for a fresh start.
Pros
- Ready in under a minute - no setup at all
- No technical knowledge required
- Doesn't use your computer or expose your IP
- Online 24/7 - friends play even when you're not around
- Updates, performance, and backups are handled for you
Cons
- Costs $20/month
- Vanilla only - no mods or plugins
- Less control than running the machine yourself
Best for: friend groups who want their own server without anyone becoming the IT department.
Comparison: All 3 Methods
| Feature | Self-hosted (your PC) | VPS | LuckyChunk |
|---|---|---|---|
| Cost | Free | $5-15/mo | $20/mo |
| Setup time | 30-60 minutes | 30-60 minutes | Under a minute |
| Technical knowledge | Port forwarding, Java, terminal | SSH, Linux basics | None |
| Online 24/7 | Only while your PC is on | ✓ | ✓ |
| Home IP stays private | ✗ | ✓ | ✓ |
| Max players | Depends on hardware | Depends on hardware | 20 |
| Mod/plugin support | ✓ | ✓ | ✗ (vanilla only) |
| Updates and backups handled for you | ✗ | ✗ | ✓ |
Which Method Should You Choose?
It comes down to how much of a project you want this to be:
- You like tinkering and want full control? Self-host on your own PC, or grab a VPS if you want it always on. Be ready to handle setup, updates, and the occasional 2 AM crash.
- You just want to play? Use LuckyChunk. Pick a version, pay, done in under a minute.
- Trying to spend $0 without self-hosting? Our free Minecraft server hosting guide covers Aternos and Minehut honestly - what works, what will drive you up the wall.
Whichever way you go, once the server is running your friends just need the address. Send them our how to join a Minecraft server guide if they need help connecting.
Quick Answers
Is it free to make a Minecraft server?
Yes - the official server software is a free download, and running it on your own computer costs nothing. What you pay for elsewhere is convenience: a VPS ($5-15/month) keeps it online 24/7, and a hosted service like LuckyChunk ($20/month) removes the setup entirely.
How much RAM does a Minecraft server need?
2 GB runs a vanilla server for a small friend group comfortably; 4 GB gives you headroom for more players and bigger explored areas. Mods change the math - heavily modded servers want 6-8 GB or more. More RAM past what you need does nothing, so don't overbuy.
Can I run a server and play on the same PC?
Yes, if the machine has RAM to spare - 8 GB total is the realistic floor, since the game and the server each take their own memory. Connect to your own server using the address localhost. Expect some lag when several friends are on, because both programs are fighting for the same hardware.
Do I need to port forward?
Only for Method 1, hosting at home - port forwarding is what lets friends reach a server that lives behind your router. A VPS is already reachable from the internet, and hosted services like LuckyChunk handle networking for you, so those need no router changes at all.
What version of Java do I need?
Match it to your Minecraft version: Java 21 for 1.20.5 and newer, Java 17 for 1.17-1.20.4, Java 8 for anything older. Wrong Java is one of the most common reasons a new server refuses to start, and the error message rarely says so plainly.